FIELD GUIDE / BOSSES
How to Beat The Artist
The Artist closes the Downtown Orientation sequence and is CONTROL Resonant's first major boss. The safest rhythm is to dodge a committed attack, strike the face during its recovery, then leave before the next tell. When it rises into the air, use…
The Artist closes the Downtown Orientation sequence and is CONTROL Resonant's first major boss. The safest rhythm is to dodge a committed attack, strike the face during its recovery, then leave before the next tell. When it rises into the air, use its stone platforms to reach the chin and knock it back down. The fight ends with an execution after the health bar empties.
The Artist closes the Downtown Orientation sequence and is CONTROL Resonant's first major boss. The safest rhythm is to dodge a committed attack, strike the face during its recovery, then leave before the next tell. When it rises into the air, use its stone platforms to reach the chin and knock it back down. The fight ends with an execution after the health bar empties.
Early attempts are difficult because you still have a small kit. Do not measure progress only by the health bar: learning whether the face hammers are set for a horizontal sweep or an overhead smash is the key to surviving long enough to win.
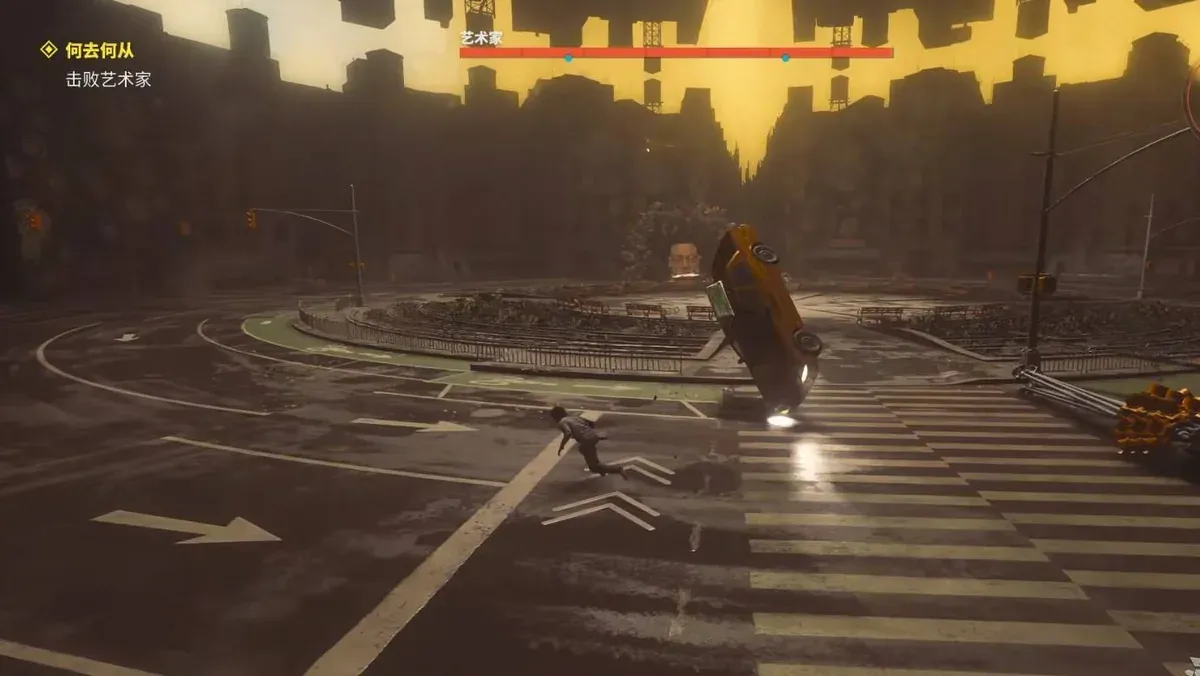
Source image: CONTROL Resonant boss guide.
Ground phase: identify the hammer stance
| Visible tell | What follows | Response |
|---|---|---|
| The Artist lifts a car at long range | A fast thrown vehicle | Move laterally as it releases the car |
| Hammers spread from both sides of the face | Wide horizontal sweep | Back out early; if already trapped, jump through the central gap |
| Hammers point forward as a vertical pair | Overhead smash | Step back or slip sideways before impact |
| The boss retreats | Rhythmic rocks, then mixed road signs and debris | Keep moving sideways and attack the face between throws |
| Stones gather in a ring | One projectile after another | Dodge each release, not the entire sequence at once |
Distance changes which attack is likely. If you stay very far away, you invite car throws. If you remain directly in front at close range after a combo, the hammer sweep can catch you. Work at a distance from which you can read the stance, then step in for a short punish. The face is the dependable damage target in the supplied fight guides.
The mixed debris is more demanding than the first rock volley because objects can come from different sides. Watch the boss and the flight path rather than staring at Dylan. Save Power for a defensive move when you are unsure whether a second object is following the first.
Aerial phase: climb to the chin
After enough damage, The Artist rises above the street and raises stone platforms. Climb them instead of trying to exhaust the remaining health from the ground. Once level with its chin, attack there to bring it back down. If your attacks seem to do little from a low platform, the issue is angle and reach, not necessarily your Build Power.
Return to the same dodge-and-punish rhythm on the street. The stone-ring projectiles follow one another, giving you a chance to move between attacks rather than using a long panic dodge.
Final phase: leave the meteor area
The last ground section speeds up familiar patterns and adds a wide meteor rain. Do not finish a combo inside the marked impact area. Move out, wait for the explosions, and then take the next opening at the face. When the bar is empty, close in and trigger the execution; continuing normal attacks at zero health will not finish the encounter.
If repeated attempts stall because Dylan barely damages the boss, check your form upgrades and early build choices. If the problem is timing, use a quick primary form and stop attacks sooner. Community reports differ on how hard this fight felt across early versions, including after balance changes; their shared useful point is that its large tells can be learned.
What does The Artist unlock?
The victory offers Barrage, Volatile Anomaly, or Shield. Barrage is a projectile option; Volatile Anomaly creates a throwable entity; Shield absorbs damage and can support a Shield Bash. Pick for the role your current loadout lacks. Your initial choice is the one you use now; changing or adding options later depends on Reset Items and later progression, explained in the abilities guide.
The boss overview shows the next Resonant routes and rewards. Return to the guide hub for the early story walkthrough and side quests.
Sources and notes
Game details are based on the linked guides and supplied research. They have not all been independently tested in game.